Sunday, November 6, 2011

End of Line

Whew... caring for a little one is exhausting! I haven't had much time to post, let alone make anything. However, here are some things I've been working on in the last few weeks:

Dinosaur Ribbon Rattle:
Photobucket

I googled "dinosaur images", printed one out, traced into fabric, sewed it to together (with the ribbon), and stuffed it full of stuffing and jingle bells. My little man loves it. He holds it around the neck all time (because its the easiest place for him to hold it) so it always looks like he's strangling it. :)

I've continued to work on those diapers. I made him this orange one, using the same Babyville Boutique pattern as before. It leaked out the side a bit so we added extra snaps to make it smaller in length and it seemd to hold up okay:

Photobucket
He doesn't nap much during the day so I haven't had time to get any more of them done. (He does sleep through the night except when he wants to eat, so one must be grateful of that!)

Next up is my "mystery project" that requires lots and lots of yo-yos. Below is the first yo-yo that I made and I've fallen in love with making these things!

Photobucket

This "mystery" project also includes the following: Photobucket

Photobucket

Care to take a guess as to what I'm making????

That's all I have for now to share. My little man just fell asleep is his swing so I'm going to take these few precious moments that I have and go clean up my kitchen!

Monday, October 10, 2011

Mom Days...

What do you do when you have a 3.5 week old baby, you're exhausted, and you need to make dinner? You dig through your pantry and see what you make with what you got. Here's what I ended up making for dinner last night. Simple, easy, and best of all it is something that my husband will eat again!
Photobucket
Chicken Alfredo!

Here's what you need:
4 boneless skinless chicken breasts
1 egg
Bread Crumbs (I used Italian)
Noodles
Alfredo Sauce

Preheat your oven to 400 degrees. Dip the chicken breasts in the egg and then in the bread crumbs. Drop them in a 9 x 13 baking dish (I always line mine with foil first so that the clean up is easier). Drop them in the oven for 20 minutes.

While the chicken is cooking, cook the pasta, drain. Cut up the chicken breasts into smaller pieces, drop over the noodles, and cover with Alfredo sauce. Voila. Dinner in less than 30 minutes.

Onto the savings! As any good money saver/crafter knows, JoAnn Fabrics has fantastic deals over the holiday weekends. This weekend (being Columbus Day weekend) they had Simplicity patterns on sale for 99 cents. This time I was smart. I went into the store on Thursday (the day before the sale started) and wrote down the pattern numbers that I wanted. I went in Friday morning as soon as the store opened and while all the other ladies were digging through the books, I dug through the cabinets! Bwahaha!

Photobucket

Total spent: $10.98
Money Saved: $124.90

Woot! Woot! McCall's patterns go on sale Thursday. I've got the pattern numbers I want, so when my hubby gets home from work (or rather before he goes in) I intend to hit up the cabinets!

Earlier in the week I made a few bibs for the Little Man:
Photobucket

I had leftover fabric from his tummy pillow:
Photobucket

I had some Cars fabric in my stash that I picked up over a year ago at a Hobby Lobby and now I finally had a use for it:
Photobucket

I also had some snowman fabric left over from last Christmas. Photobucket

I certainly won't be making any more bibs for the little man. Not that I didn't enjoy making them or that I didn't like them, but because he has so many of them! We've gotten bunches of them in the mail from family over the last few weeks, and bibs are certainly one thing he doesn't need anymore of!

Last but not least, some binky leashes:

Photobucket

These were made using ribbon I found in my stash and suspender clips (which were actually a pain in the neck to find! I thought for sure that stores like JoAnns and Hobby Lobby would carry them, but apparently not...)
Photobucket

And I put my new snaps and snap plier to good use:
Photobucket

I don't know how much use we'll actually get out of the binky leashes though, because so far he really doesn't use his binkys.

Okay, whew, I think I'm all caught up on things that I have completed and finished. My husband goes back to work tomorrow so I doubt I will get any crafting done while he's at work. Although Little Man has more or less slept through today, so here's hoping he sleeps most of the day tomorrow. I need to get his diapers done!

Sunday, October 9, 2011

Adventures in Diapering

So I've been trying to write this post ALL DAY. What happened to Little Man napping all day long and Mom being able to get stuff done? Like laundry, homework, craft projects??? He slept for a few hours this morning, which of course my husband and I conked out with him on the bed, because we were so exhausted. For the past three hours he's been awake and fussy. I couldn't get him to sleep or calm down. I hand him over to my husband and in less than a minute he's passed out alseep. What in the world little man? I swear he hates me, my husband says he doesn't. He just loves his daddy. Whatever, hubby, whatever.

My husband has been big on trying the cloth diapers, something that up until now I have been avoiding. But dang are diapers expensive! So dear hubby bought a one size only diaper from Bum Genius. We gave it a try and it wasn't as bad as I thought it would be. The diapers are about $20 a piece, so to get 5 of them it would be around $100. My husband took one look at the price tags and the diaper he purchased and decided that I could make those.

Well then...

We went to JoAnn Fabrics and holy cow what do you know? There was new line of diaper making products put out by Babyville Boutique. We looked at the cost of items and the book and I dug out all of the 40% and 50% off coupons that I had stored up. The cost of materials wasn't too expensive (about $14.99 for PUL fabric for three diapers) and I got EVERYTHING at 40 to 50% off thanks to those wonderful coupons. So the cost per diaper (not including the cost of the tools or thread) is about $3.50-$5.00 a diaper. What a difference from $20.00!

Of course, like with every big project there is a crazy snag. The fact that the Babyville Plyers were out of stock at my local JoAnns. *gasp* So I had to go to the next closest JoAnns (which was only about 20 minutes away but I didn't want to be seperated from Little One for that long). So I drove up there, grabbed one of the lose bloody plier tools, slammed down a 50% off coupon and wnet home with my prize:

Photobucket

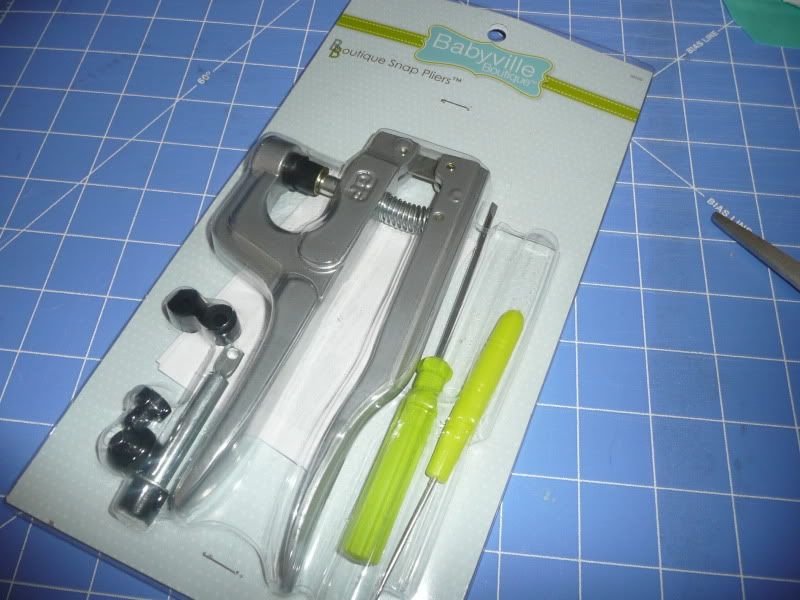
Now, I was armed and ready to make my diapers!

So I opened the diaper making book (published by Babyville Boutique) to the center pages to make the flannel pocket diaper. A few things I've learned:

1. DON'T invest in the template plastic as recommended. A regular hole punch will not reach where you need to punch the holes and trying to fold the plastic down to punch them is a pain in the butt. I recommend using a piece of cardstock. Heck, even a piece of paper would be good enough.

2. It is vitally important to make sure that the plastic snaps are centered on the snap pliers. If not, you'll crack the sides of the snaps. I did this about three times, before figuring out why I kept breaking them.

3. This is the best way I've ever seen to apply snaps

4. I hate sewing elastic. What a pain.

Snap Pliers? Awesome. Highly recommend this tool and the plastic snaps, even if you are not making diapers. WAY better than sew on snaps.

The book? I'd give the instructions a 4 out of 5 stars. I would not recommend this project to beginners (although why a beginner would want to tackle diaper making is beyond me). There were some items left out in the instructions (such as leaving space at the top of the diaper to turn it right side out) that would leave a rookie confused and with a mess on his/her hands.

One thing that really bothers me is that there are several places in the pattern book where they tell you to reference their website. Guess what? Their website says "COMING SOON". In this day and age I think its important to make sure that your website is up and running before your product hits the shelves, especially if you're telling people in your book to go to your website for more information!

But I digress, overall I am very impressed with Babyville Boutique and went back to JoAnns today to get more PUL fabric in order to make some more diapers.

It took about three hours (working here and there) to make the diaper and the soaker yesterday. I had to keep stopping because Little Man needed to eat (I'm convinced that he's going through a growth spurt because I swear he's constantly attached to me). I started with the diaper. I couldn't find microfleece at the fabric stores, so I ended up using flannel.

Photobucket
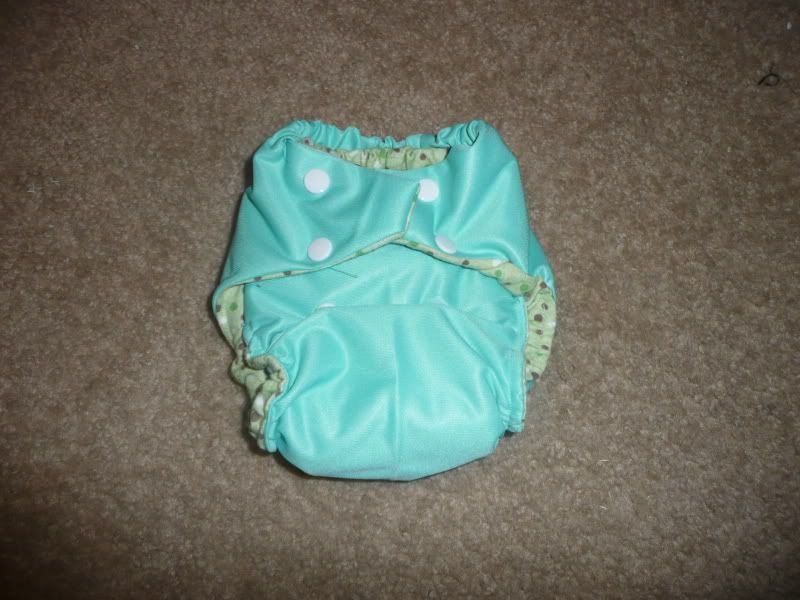
(somehow I messed up on the wings and I had to move my snaps back on the wings in order to make it a successful diaper.

Photobucket

PhotobucketPhotobucket

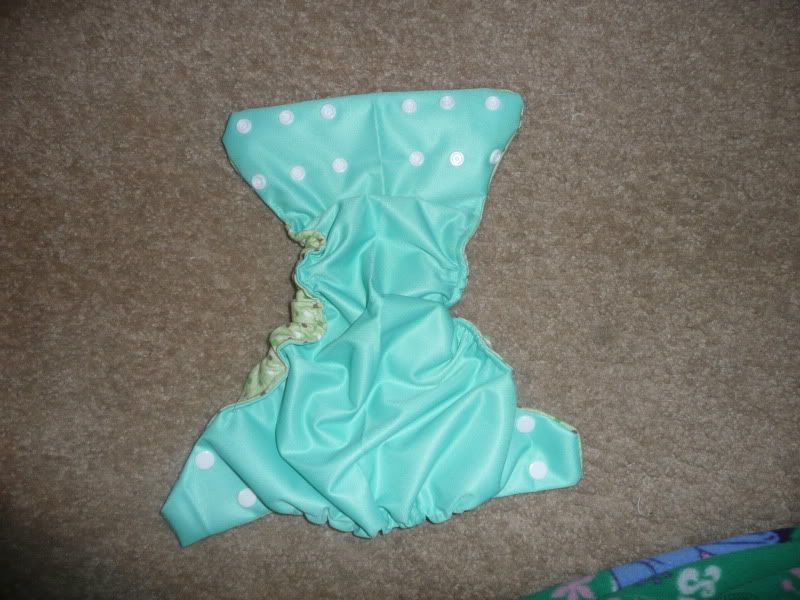
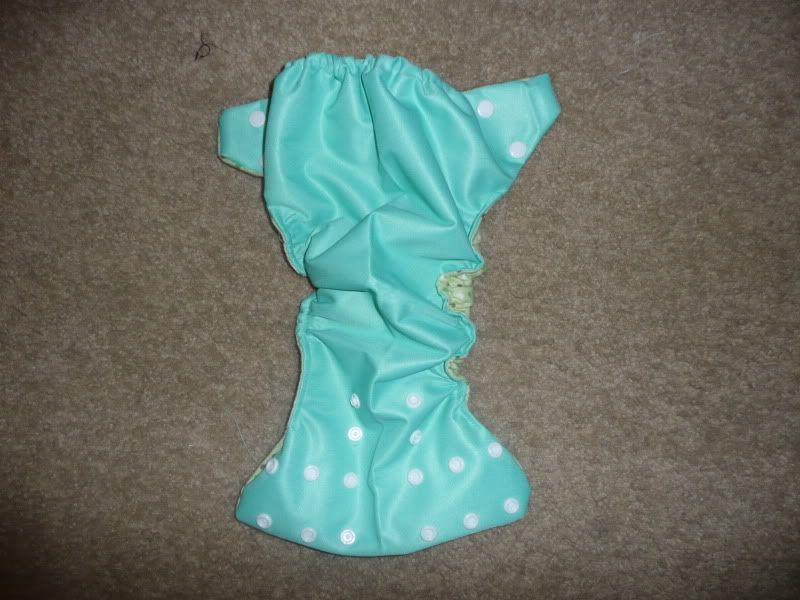
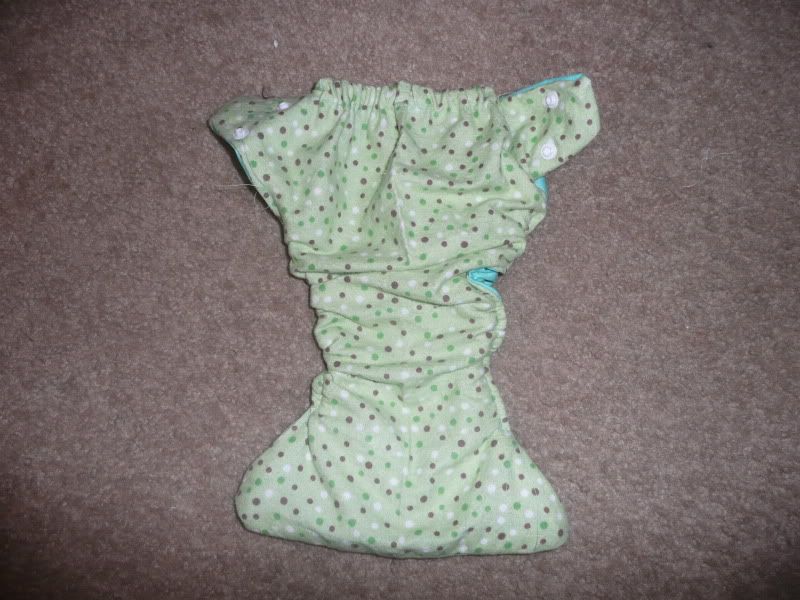
After succesfully completing the diaper I started on the soaker (super easy):
Photobucket

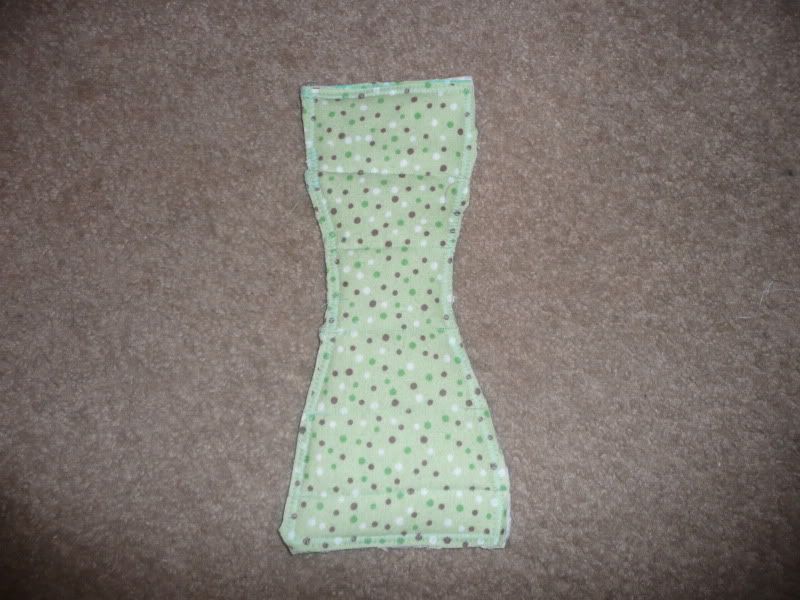
I didn't want to test it out over night so we tested it out first thing this morning. I made the small diaper and the small soaker. He has some room to grow into it but not much, since I messed up on the wings. About five seconds after I put him in it, he pooped. I was hoping to test it out with some urine (what has motherhood done to me?) to see if it was as absorbant as it needed to be and if the legs were tight enough to keep it in the diaper. Oh well. Its being washed, so I'll update later with how it held up in the wash.

I wanted to try and make a one size only diaper today, but the Little Man is refusing to sleep. Its 10:45 at night and he's back to being cranky...

Monday, October 3, 2011

Things I Haven't Posted but Should Have... Part 2

Every now and then I get the motivation to try and cook, bake, or make something edible. Sometimes it turns out great. Most of the time, its a mess. I still have fun with it and that, my friends, is the most important part! My husband and I broke in our new home by grilling hamburgers and hotdogs. I made his favorite pasta salad and some extra festive Fourth of July treats to go with it.

First up is a very festive looking beverage. I found the recipe here at Divine Dinner Party. (Scroll down). One very important thing that I learned is that, yes, the ice is important! I actually enjoyed it (considering the fact that I don't like Gatorade or Cranberry juice).
Photobucket

As directed, I served with a festive straw:
Photobucket

Next up is a Trifle Receipe that I found at the Food Network. My husband does not like Strawberries (than come to find out the day after our son was born, he's never actually TRIED one), so I topped it with raspberries instead. This was certainly my favorite desert that I've ever made. Its a good thing it was just the two of us, because this got eaten really quickly!
Photobucket
Photobucket
Photobucket

Finally, I found these really cute Fourth of July Rice Crispy Bars, thanks to Two Hearts Together. However, mine were... less than festive looking. The package of Air Heads I purchased didn't contain white, I didn't feel like going back to the store, and my husband doesn't eat them anways... so this is what I ended up with:
Photobucket
Despite the less than fantastic look, the rice crispy treats were still yummy, and that's what matters! :) Of course, I hope to perfect them in the upcoming years so that we have a backyard BBQ at house someday...

All in all, I would say it was a successful Fourth of July!

Things I Haven't Posted but Should Have... Part 1

My one year anniversy is coming up in Nov. and *gasp* I STILL have not posted photos of my wedding dress. I used a Simplicity pattern as a template and modified it to fit what I wanted. When I got engaged, I knew the kind of dress that I wanted. I also knew that I could make it for cheaper than what I would pay for it in the store. I didn't take many in progress photos, because I was engaged in what I was doing.

I purchased everything I needed from the zipper to the fabric to the lining using those fantastic 40% coupons that JoAnn Fabrics sends me in the mail. Total cost: About $50.00. I started working on it over my fall break (less than 3 weeks from my wedding date!). I worked on it for about four hours a day for four days... while watching marathons of TLC's Say Yes to the Dress. (Man, I can be such a girl sometimes!)

This was an adventure, to say the least. I had to use horse hair braid and boning in this dress, both of which I have never worked with before. I was horrifed of screwing it up, but I'm really pleased with the results.

Here are some photos, while I was working (and playing around with it):

Photobucket

Below is a photo of the back. This was a pain in the neck because I had to hand stitch the zipper in so that you wouldn't see the seams.
Photobucket

Around the middle is a large chunk of black ribbon, which runs all the way down the back. I love the way that it looked (and it hid the seams that connected the bodice of the dress to the skirt):
Photobucket

A side shot:
Photobucket

Another side shot:
Photobucket

About 5 seconds into the wedding, I was SO thankful that I had made my own dress, rather than purchase it. Why? My darling husband stepped on the train of my dress, thereby jerking me backwards (hard! No, I didn't fall.). The dress stood up to the test, it didn't rip, tear, or even budge! Had I purchased a dress, it probably would've ripped. What a memory that would have been!

Some photos of the big day:

Photobucket
(the ribbon was tied around a heart shaped pin in the back).

Photobucket

Photobucket

Photobucket

Photobucket

Photobucket

Photobucket

I loved my dres so much. Too bad pregnancy killed my body and I won't fit into it anymore...

Wednesday, September 28, 2011

Getting Baby's Room Organized

So.... this SHOULD have been done before Baby arrived. In all fairness, I was working on these the day that my water broke. I just didn't get to finish them until this morning. While crusing the internet (via google) I found this great tutorial on how to make baby clothes size dividers. Awesome tutorial by Craftaholics Anonymous.

I chose to use scotch tape rather than velcro to attach my numbers/letters. Mine are double sided and here's what I learned: Glue sticks are SO much better for glueing paper to wood than the Modge Podge.

I chose to use animal print scrapbooking paper and animal print ribbon to hang from the closet, given that the nursery has a jungle theme:
Photobucket
Notice how there's an extra one? Yeah... because I had to pack away my son's newborn size clothes already! (Granted, he arrived in this world at 8 lbs even, so...)

Close up shot of just the hangers:
Photobucket

Here they are with the ribbons:
Photobucket

Close up shot:
Photobucket
The One stands for one size only (the sleeper sacks only come in one size).

The ribbons themselves:
Photobucket Photobucket

... and finally hanging in the closet (yes my son does need more clothes!)

Photobucket Photobucket

This was a quick and easy project (or rather it would have been, had my little man arrived on time, rather than early). Still... I'm glad its done. With all the stuff he's starting to aquire (being the only great-grandchild, grandchild, and nephew on both sides of the family that's not a surprise), I want to get an early handle on making sure his stuff is organized!

Annoyed...

I am so sick and tired of never getting recognition. Granted, that is not why I do the crafty things that I do. I do them because I enjoy making things. I do them to give the people that I love unique and wonderful gifts. However, once and while there are things like THIS that just burn my cupcakes. (I'm actually talking cupcakes here).

Back in June I posted these Angry Bird Cupcakes to my blog and also listed a post which can be found here at Craftster. Like all the posts I make at craftster I got about two responses, which for me is usual, and which is why I generally don't post there very often.

A few weeks later another crafty person found inspiration from my post and made cupcakes for her Dad for Father's Day (see here posting here.) I'm glad that someone else found inspiration in something that I made (that in all fairness I found inspiration from another individual and followed her tutorial).

But what annoys me is this posting here where the other crafty individual gets featured in an article and I'm just forgotten about.

Yes, its petty and I need to let it go. If this was the first time something like this has happened, I wouldn't be so annoyed, but this happens constantly in my personal and professional life. Someone else finds inspiration from something I did and this other individual is always the person that gets featured here or there or somewhere else.

**Deep Breath** okay... I'm over it. I've said my peace. I'm going to let it go and get back to crafting things for my wonderful baby boy.

Tuesday, September 27, 2011

Hanging Baby Quilt

As I had mentioned in my previous post, I made a baby quilt from fabric I found at JoAnn's to hang in my son's nursery. Here it is, in all its glory:
Photobucket
I chose to back it with giraffe print fabric. (There's Sandy, wanting to be in the middle of everything).
Photobucket
A close up of the back, I strung ribbon across the back of it in order to hang it on the wall:
Photobucket

Wednesday, September 21, 2011

Baby Overload

I didn't get much crafting done in July or in August, as I was preparing to go back to work. Boo. I also didn't have much motivation. I was running around like a mad woman trying to get not only my classroom set up, but also get it ready so I can go on maternity leave.

My due date was Sept. 18th. I was planning on working up until I went into labor, but then I was feeling pretty miserable (mostly at night and probably because I was working all day), so my husband and I discussed it and decided to make my last day at work Friday, Sept. 9th. At that point I want crazy with surfing the internet (thank you google!) for baby crafts and digging through my sewing patterns stash (love those 99 cents sales at JoAnns).

I got to work pulling together a list of ideas and then materials (I've mostly been working through my stash, buying very little), crafting. I worked nonstop on Monday, Sept. 12th... then my water broke (more like slowly started leaking) that evening.

Baby Alexander was born the following morning (via C-Section, he was breeched). Good thing my last day was a week earlier! So... to make a long story, shorter, here's what I got completed before my precious little son was born:

First up, are some items I created using (and I hang my head in shame at this) Simplicity patterns. Good thing I refuse to pay full price for those patterns, cuz these I probably could have sketched up on my own - if I ever paid attention to babies and their things before.

These all came from the same pattern (I don't have the number in front of me) but I think the title was something along the lines of "diaper bag and diaper bag acessories".

This is a portable changing pad. I LOVE this item. Since our baby is sleeping in a pack-in-play with an attached changing table in our bedroom currently, this is a great item that we are using right now. Once we start traveling with our baby this can be rolled up and placed in the diaper bag. The fabric is sandwhiched between vinyl (I hate working with that stuff) and terrycloth. The vinyl is great (even though I hate using it with my sewing machine) because I can just wipe down any messes he makes.

Photobucket

Photobucket

The next item that came from this batch of patterns is a tummy pillow. No its not a breast feeding pillow (its not big enough for that). Once baby gets a little bigger (and can hold his head up) it'll be a great item to help make his tummy muscles stronger. My husband and I chose the jungle fabric because his nursery is jungle themed.

Photobucket

The final item that I managed to finish (from the Simplicity pattern) before Alexander made his debut was a burping cloth (well, actually three). Easy pattern. One side is the fabric the back side is terry cloth. I only bought enough fabric to make one (the pattern called for 3/4yd) but guess what? 3/4 of a yard gets you three plus some extra! I wish I had made more though... he spits up so much.

Photobucket

Photobucket

While my husband and I were digging through the nursery prints at JoAnn's, we found some fabric to make those awesome cloth books. I used fusible batting in between the pages instead of quilt batting (quilt batting would have been WAY too thick to make this work with my sewing machine). Oddly enough, the characters on the tummy pillow are the same characters in the cloth book and on the wall hanging that I made (which I don't have pictures of yet.)

Here's the book:

Photobucket

Photobucket

Photobucket

Photobucket

Photobucket

Photobucket

Photobucket

(I still need to use fabric markers to fill out the back page).

The final item that I managed to get through (well half way through) before my little bundle of joy arrived were these write rattles. I made WAY too many, but they were so easy to make, I couldn't help myself.

I found this great pattern on how to make wrist rattles. I use fabric scraps and fat quarters that I had home. The only thing new I had to purchase were the little patches (which came nine in a pack). I probably should have saved the patches for something else to make for him, but I was on a crafting overload. Plus these things were just too cute! I couldn't help myself.

Photobucket

Photobucket

Photobucket

Photobucket

Photobucket

Photobucket

Photobucket

Photobucket

Photobucket

Photobucket

Photobucket

I have TONS of more things that I want to make for my wonderful baby. I need more geek crafts (I have a Yoda and Boba Fett rattle in mind, along with a Star Wars Quiet Book and Mario Brothers booties). I also want to make some crinkle toys, bibs, and covers for my nursing pillow. I'm on maternity leave through Thanksgiving and I have the perfect little man who sleeps all the time, so we'll see what I get done.