Monday, June 24, 2013

Oh, Christmas Tree!

So this post as been on hold since late November of 2012. I had to figure out how to use the wonderful new photobucket (sarcasam, people, sarcasm) and being a working mom who teaches for a living blogging is on the bottom of my list. *sigh* So I'm uploading 99+ photos to photobucket as we speak. Ew. This is going to take forever.

Despite working like crazy and being overwhelmed (to put it mildly) I still managed to find time to put together a more or less mediocre Christmas for my little family. Christmas 2012 included a Christmas book countdown, Elf on the Shelf, and of course handmade ornaments (always a must!)

The picture book countdown as by far the easiest part of the project. I simply located 24 Christmas books (a lot easier than what it sounds) and wrapped them up in identical wrapping paper. I then labeled each book with a number. I numbered them specifically because there were certain books that I wanted to read on certain days:

 photo P1110204.jpg

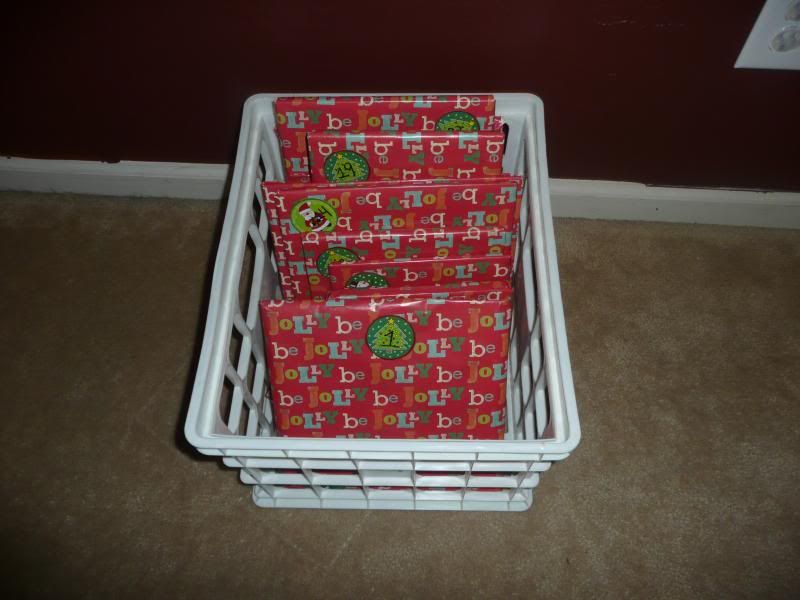
They sat next to the Christmas tree for the entire month of December. I think this year, I am going to add 25 books, so that we have a new Christmas book to read on Christmas.

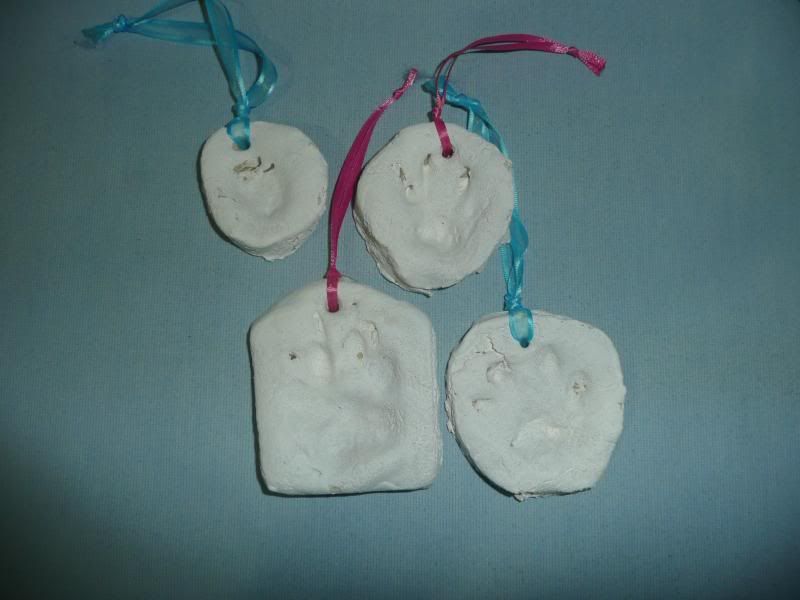
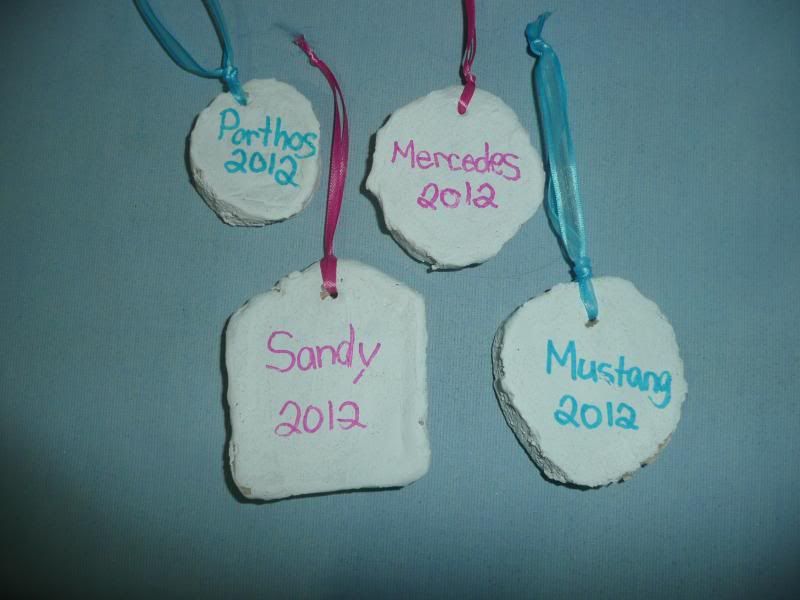
This year we (meaning, I) also made some salt dough ornaments, using our fur babies' paw prints:
 photo P1110236.jpg

The on the back, I labeled them (just using a sharpie marker and AFTER they had cooked in the oven) with the critter's name and the year.
 photo P1110238.jpg
They are a little rough around the edges, but oh well, what are you going to do when you are a crazy, overworked mom?

It put me in the ornament making mood, so I looked through pintrest and various crafting sites for inspiration. Only Michael's (for some reason) carries the hallowed out ornaments made of plastic. Everyone else carries glass. No thank you. I knew my son was going to go bonzo over the Christmas tree (and the pretty, shiny objects hanging from it) so I insisted on making my ornaments out of plastic.

This first one is an Ispy ornament. It is filled with pellon beads and various buttons, beads, and other trinkets that go with Christmas. I super glued the top of the ornament on because I didn't want a disastrous mess once my little man figured out how to open it up. He beat the living daylights out of it and it still held up. Yea!
 photo P1110241.jpg

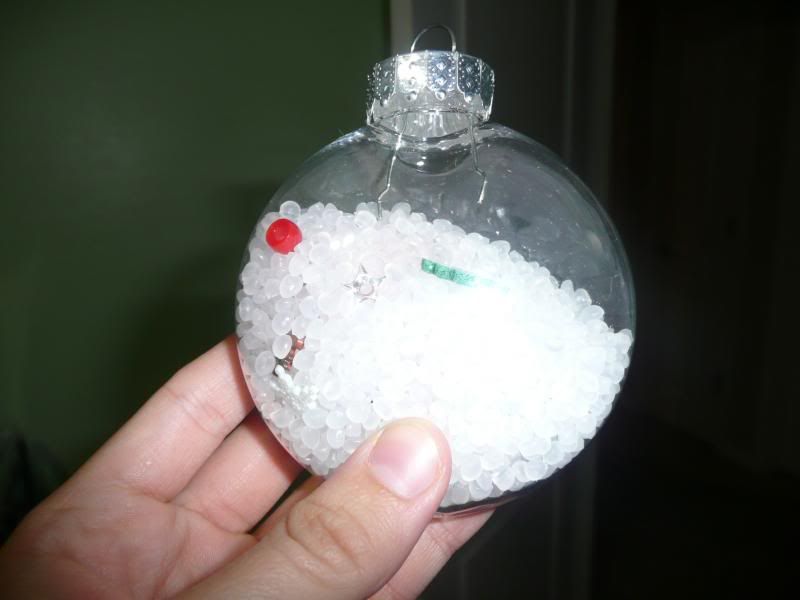
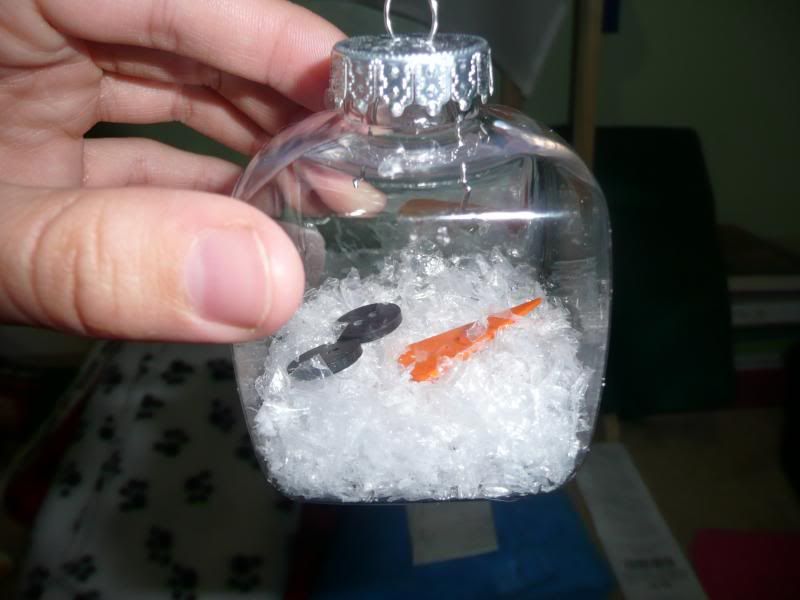
A snowman ornament is up next. He's adorable isn't he? I filled the ornament with fake snow and some buttons. SO easy and so cute!
 photo P1110243.jpg

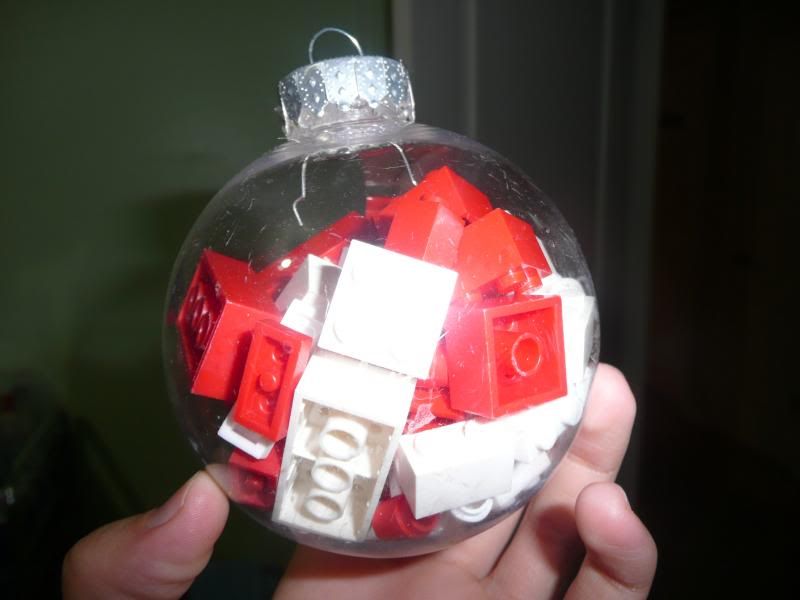
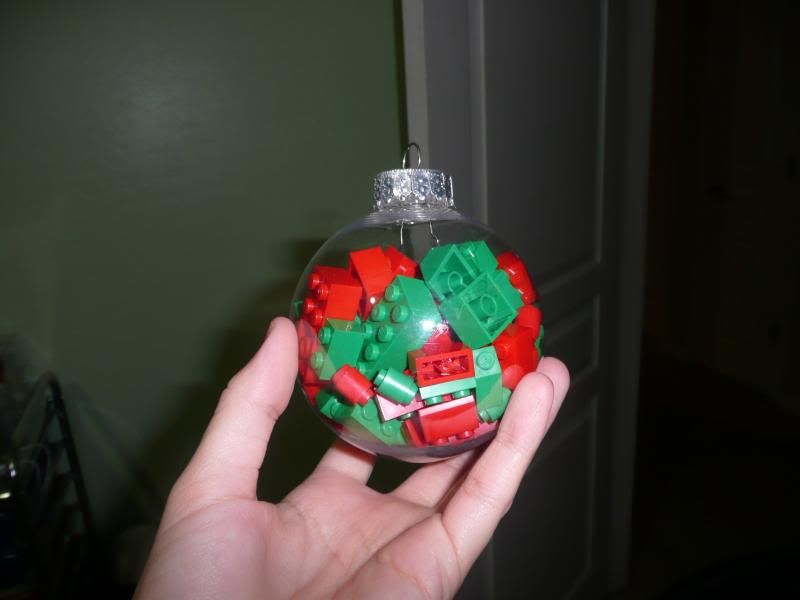
My husband actually inspired this next one. He saw these lego ornaments in their Christmas catalog and they were charging $8 an ornament. Not bad for an ornament, but hey, I could make it for 49 cents! Can't beat the that (the ornaments were on sale at Michael's and I already had the legos on hand!)
 photo P1110247.jpg

 photo P1110254.jpg

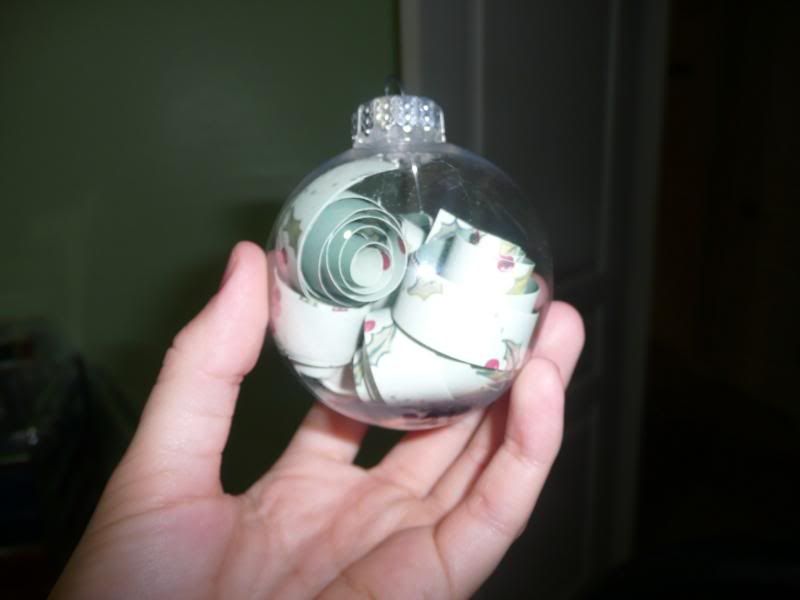
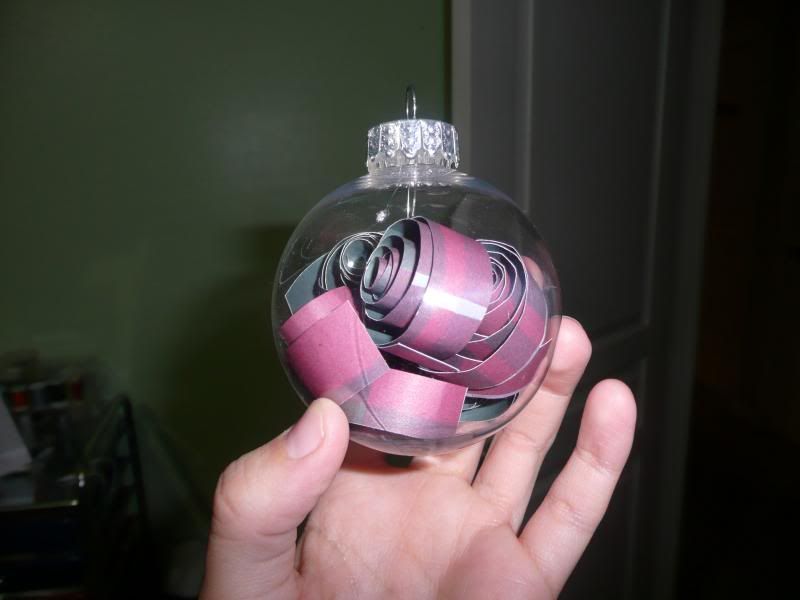
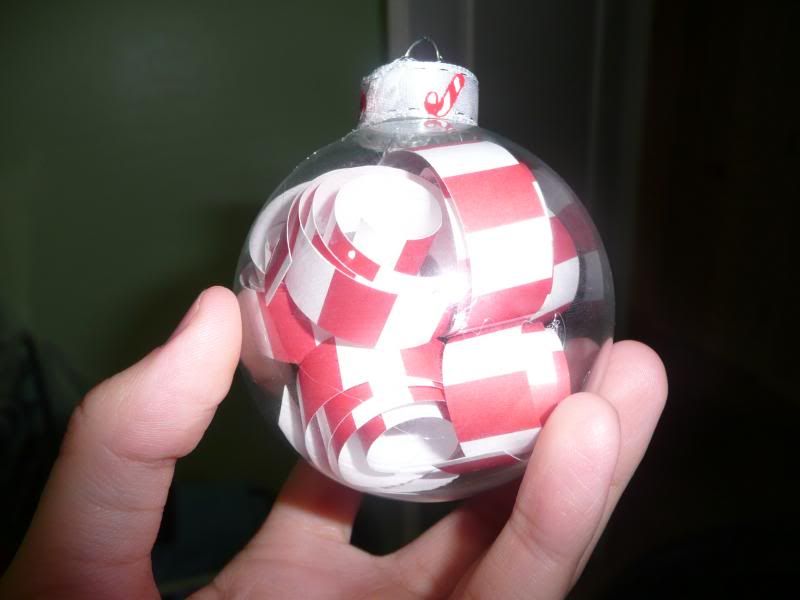
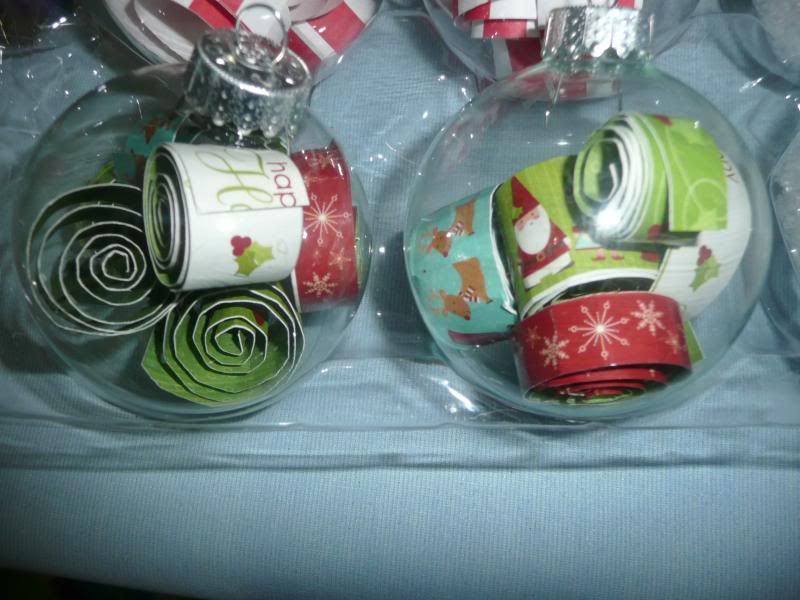
This next little batch is also super easy. I simply used my paper cutter to cut strips of paper, then rolled them really tight around a pencil. I shoved them into the ornament where they unwound and voila!

 photo P1110249.jpg

 photo P1110253.jpg

 photo P1110257.jpg

 photo P1110263.jpg

So that wraps up Christmas DIY 2012. Only six... almost seven... months late. I was at hobby lobby the other day and they are already putting out their Christmas gear. Makes me think I really need to get in gear this year! Especially since our next child is arriving in early November. Better start now!

Sunday, June 23, 2013

B-L-U-E spells blue!

So, again, I failed to take pictures of all things blue. Oh well. Here's a few things I added to our color learning experience: 1) Blue balloons. My son loved these! 97 cents at Wal-Mart for 12. I saved them and used them throughout the week. I would give him a balloon randomly to chase around and even filled our backyard wade pool with balloons (that was a huge hit!) 2) I also found a library book titled Blue: seeing blue all around us by Sarah L Schuette at our local library that I added to our reading list. This week is a short week, since we are headed on vacation on Thursday, but in that short amount of time we will be working on green. (Hopefully, I will remember to post some pictures!)

Saturday, June 15, 2013

Learning about the color yellow!

It is hard to keep a 20 month old occupied all day long. The most frustrating part of being a new SAHM is that many of the activities listed for kids ages 15-36 months are not appropriate for him. Tot packs are cute, but for an active 20 month old boy? I don't think so. I spent time, printing and laminating these lovely images and he simply folds them in half. *sigh* What to do, what to do?

So I set myself to pintrest to try to find some things that we can do that are educational and age appropriate for an active young man. I had no idea what I was in for. I discovered this Color of the Week curriculum (what else would you call it?) over at PlayCreateExplore and fell in love. There were wonderful ideas here that didn't just involve flashcards. (The teacher in me is horrified by the amount of parents that teach only through flash cards. Don't get me wrong, flash cards are great, but they are not the end all be all of education).

So I decided to start with yellow, as the author did, simply because we have yellow things in my house. (What we are going to do when we have to learn about pink or purple, I have no clue.)

I used quiet a few of her ideas and they were fantastic! Here is a list:
1. Sensory bin with yellow Easter Grass
2. Sensory bin filled with all his yellow toys (huge hit!)
3. Yellow foam bath tub toys
4. Yellow finger painting
5. Yellow shaving cream painting in the bath tub

I also pulled a few things from other sites that were also a big hit:

6. Side Walk Chalk in a Bottle. Growing a Jeweled Rose has this great recipe for making fizzy side walk chalk using items that I already had on hand. My little man absolutely loved it while he was waiting for his wading pool to fill up. We simply painting only with yellow chalk this week.
7. Color Poems: Oceans of First Grade Fun had these cute little color poems that I printed on cardstock and laminated. We read our color poem every morning with breakfast.
8. Color Songs. Again, printed, and laminated
9. Color Matching Cards created by Homeschool Creations.

I simply put the poem, song, and cards in a pocket chart within his reach and every morning he showed them off to daddy. (He's so cute when he's not throwing a temper tantrum).

Starting next week we will be working with the color blue, so stay tuned!